
Understanding Bee Biology
The Bee Colony Structure
When I first delved into beekeeping, understanding the structure of a bee colony was like getting to know a new family. In every hive, there’s a queen, worker bees, and drones. The queen is the heart of the colony, responsible for laying eggs and ensuring the hive thrives. The worker bees, which make up the majority, do the heavy lifting, from foraging for nectar to cleaning the hive.
Drones are the male bees, and their main job is to mate with a queen. However, they don’t contribute to the daily maintenance of the hive. As I learned about them, I realized how important each role is. It’s a finely tuned collaboration, and each bee plays its part in keeping the community alive.
As new beekeepers, it’s crucial to familiarize ourselves with these roles because it helps us understand how to properly manage the hive. Knowledge of bee biology can also provide insights into resolving issues when things go wrong, like if the queen is gone or if the colony is stressed.

Life Cycle of a Bee
The life cycle of a bee is pretty fascinating. Bees go through four stages: egg, larva, pupa, and adult. The queen lays tiny eggs in hexagonal cells, and within a few days, those eggs hatch into larvae. Believe me when I say these little critters grow fast! The workers feed them royal jelly, honey, and pollen as they develop.
After about six days, the larvae spin a cocoon around themselves, entering the pupa stage. In this phase, they undergo some serious changes, which is kind of like a magical transformation. Then, about two weeks later, they emerge as fully grown adult bees!
Understanding this life cycle has helped me appreciate what’s happening in my hive at every stage. When I see a new bee, I consider how it fits into the rhythm of my hive and the work that lies ahead for it. Knowing these phases can also alert me to potential problems, like a lack of egg-laying or delayed development.
Importance of Pollination
Let’s talk about the role bees play in pollination! This is where it gets really exciting! Bees are nature’s little workers, helping to pollinate approximately 75% of flowering plants. This includes many crops we eat every day. It’s amazing to consider how much of an impact my little hive has on the ecosystem.
By learning about their pollination habits, I discovered that bees prefer certain flowers over others. They’re drawn to vibrant colors and sweet scents, which makes choosing plants for your garden or farm really important if you want to encourage their visits.
Having a thriving bee population around my garden has led to not only happier plants but also a more diverse and lush environment. Plus, it’s pretty heartwarming to see my bees buzzing around, doing their thing while I tend to my own plants. It’s like we’re all working together in harmony!
Choosing Your Beekeeping Equipment
Basic Tools You’ll Need
Getting into beekeeping requires some essential tools – think of them as your beekeeping kit. First up, you’ll need a good bee suit. Trust me, you don’t want to get stung, and a suit makes the whole experience much more comfortable. Then there’s the smoker, which calms the bees when you’re checking the hive. Using a smoker can make your inspections go a lot smoother.
Another must-have is a hive tool. This handy instrument helps pry apart hive boxes and scrape off excess wax or propolis. It sounds simple, but when you’re in the thick of it, you’ll find it indispensable. And don’t forget a bee brush to gently move bees off frames without harming them!
When I first started, I thought, “How much could I really need?” but I soon learned that having the right tools made all the difference. A well-prepared beekeeper is a happy beekeeper, so investing in quality tools pays off in the long run.
Choosing the Right Hive
Choosing the right hive is another crucial part of my beekeeping journey. There are several types of hives out there, with the Langstroth hive being the most popular among beginners. Its stacked boxes make inspections easier since you can add or remove layers as needed.
I also came across top-bar hives, which allow bees to build their comb in a more natural way. Although they can be a little more complex for newbies, the connection with nature can be very rewarding. Each type has its pros and cons, and deciding on one depends on your needs and preferences.
After some research, I settled on a Langstroth hive, and I’ve never looked back! I love the efficiency and ease of inspecting my bees while they do their thing. It’s like being their curious neighbor who pops in for a quick hello!
Where to Purchase Equipment
When I decided to start beekeeping, my first challenge was where to get all my gear. Local beekeeping supply stores are a goldmine! You can often find experienced beekeepers working there who are more than happy to share tips and advice.
Another great option is online retailers where you can find bundles or starter kits specifically designed for newbies like us. I found some fantastic deals online, and being able to compare products really helped me make informed choices on quality and cost.
Don’t forget about local beekeeping clubs or associations. They often organize bulk purchases or even have equipment for sale or rent. Connecting with fellow beekeepers in my area has led to some great friendships and countless learning opportunities.
Setting Up Your Hive
Selecting a Location
Choosing the right spot for my hive was one of the most important decisions I made. Ideally, the hive should be in an area that gets lots of sunlight but also has some shade for those hot summer days. It should be sheltered from strong winds and ideally near a water source to keep my bees hydrated.
I learned that keeping the hive at least 3-5 feet off the ground helped with ventilation and kept pests at bay. Additionally, positioning it away from high traffic areas ensures that my bees can come and go without feeling stressed. Who knew real estate had such an impact in the bee world?
After a bit of trial and error, I found the perfect spot in my garden. Now my bees have all they need, and I can enjoy watching them from my patio while they buzz around doing their thing! Plus, I know they’ll pollinate my flowers and vegetables!
Preparing the Hive
Once I chose the location, the next step was preparing the hive itself. This meant ensuring that all components, such as frames and wax foundation, were ready for my new bees. Proper setup is essential, so I watched a few YouTube tutorials to make sure I had everything right.
It’s vital to make sure the frames fit snugly in the hive; you don’t want your bees to have any gaps to squeeze through. I also added some sugar water in a feeder to help them establish themselves and get settled in.
When it came time for the bees to arrive, seeing the well-prepared hive felt reassuring. All my preparations were in place, and it was exciting to think that my little buzzers were about to call this place home!
Introducing Your Bees
The day I introduced my bees was one of the most exhilarating, yet nerve-wracking, moments of my beekeeping journey. I had received my package of bees excitedly, but also filled with butterflies in my stomach. I followed the instructions provided carefully to ensure a smooth transition into their new hive.
Opening the package and gently pouring the bees into their new home felt like I was welcoming them into a new family. I made sure to leave the queen in her cage for a few days so that the other bees could get used to her scent before releasing her.
After that, I kept a close eye on the hive, watching for signs of stress or unusual behavior. I learned that you have to be patient when starting, and over time, I gained confidence as I watched my bees adjust and start building their beautiful home!
Maintaining Your Hive
Regular Inspections
Maintaining a thriving hive requires regular inspections, and I’ve made it a routine to check my bees every couple of weeks. This is crucial for spotting potential problems like pests or diseases before they escalate. With my smoker in hand, I’d carefully inspect frames for healthy brood patterns and adequate honey stores.
It’s fascinating to peek into the world of my bees! Observing their behavior during these inspections has taught me so much about their needs and how to respond to them. The more I watch, the more I learn, and I find different patterns emerge throughout the seasons.
There’s something incredibly rewarding about nurturing these little creatures and being able to ensure they thrive. I’ve become more attuned to their needs over time, making me feel like I’m genuinely part of their ecosystem.
Feeding the Bees
Feeding is another important aspect of hive maintenance, especially during early spring or late fall when forage is scarce. In my first year, I quickly learned that providing a sugar syrup feeder was a lifesaver for my bees. It helps them build up their resources for colder months when they can’t source food naturally.
While supplemental feeding is important, I also discovered that there’s a fine line not to overdo it. I always ensure the feeders are clean and check for mold or debris after the bees have used them. It’s all part of keeping the hive healthy and ensuring they stay strong!
I really enjoy watching them feed on the syrup and seeing their behaviors evolve. It’s like tending to a little garden of happiness and seeing them flourish under my care.
Handling Pests and Diseases
As every beekeeper knows, dealing with pests and diseases is part of the gig. In my early days, I found Varroa mites to be a significant concern for my hives. I’d often check under my hive for signs of pests and set up traps to keep them at bay. Knowing what to look for is essential in protecting your bees.
Reading up on best practices and learning from local beekeepers has helped me a lot. There’s a wealth of resources available, from blogs to forums, where seasoned beekeepers share their experiences. I took notes on various treatments and methods and kept an eye on my bees’ health.
Managing pests is an ongoing journey. I’ve come to realize that vigilance is key, but with careful observation and adjustments, I can keep my bees safe and sound. Each challenge has only strengthened my resolve as a responsible beekeeper.
Harvesting Honey
Determining When to Harvest
There’s nothing more satisfying than harvesting honey, but knowing when to do it can be tricky! One of the first things I learned was to look for capped honey combs. Once the bees seal the honey with wax, it’s a good sign that it’s ripened and ready to be harvested.
I remember waiting with anticipation for my first honey extraction. I kept checking the frames, hoping for that beautiful golden liquid to be ready. The trick is to be patient and make sure you leave enough honey for your bees to survive through the winter.
Trust me, harvesting at the right time makes all the difference in flavor and quality. Besides, nothing beats the feeling of bringing that joyful sweetness into your home!
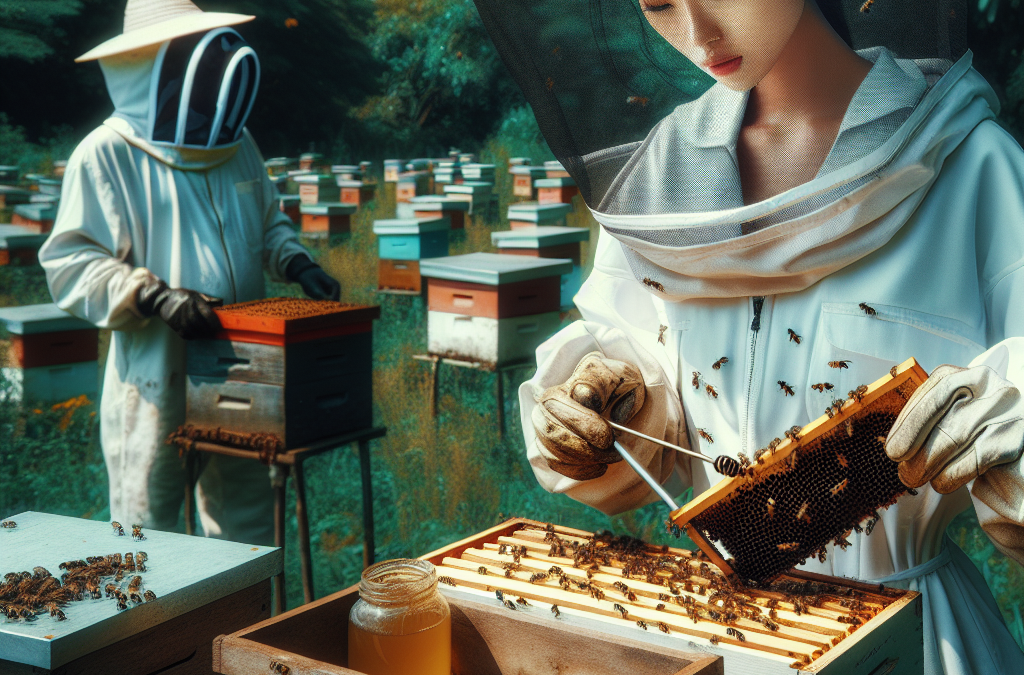
Harvesting Techniques
Once I determined it was time to harvest, I geared up for the big day. I used a simple setup with a honey extractor I borrowed from a friend. The process was surprisingly simple! After removing the frames, I took them inside to uncapping them – a bit messy, but oh, so rewarding.
Using a heated uncapping knife, I sliced through the wax caps to expose that glorious honey beneath. Watching the golden liquid flow was just magical. I could hardly contain my excitement as I later extracted the honey, filling jars with my hard-earned treasure.
It’s important to keep everything sanitary, so I made sure to clean all my equipment thoroughly after the extraction to ensure the longevity of my tools and to prevent contamination. Harvesting honey isn’t just about the sweet reward; it’s about creating a sustainable practice for future generations of bees!
Storing Your Honey
After all that hard work, I couldn’t wait to store my honey! I learned that proper storage is crucial to maintaining its quality. Glass jars are my favorite choice since they’re airtight and show off the beautiful golden hues of honey. I keep mine in a cool, dark place to prevent crystallization.
If you’re anything like me, you’ll want to taste it fresh – and trust me; honey is even better when it’s local! I bring my jars out to share with friends and family, and seeing their smiles makes it all worth it.
Moreover, knowing that I’ve harvested this honey with love and care gives it a special touch. I take pride in sharing not just the taste but the story of my beekeeping journey as well. Each jar is like a little bottle of sunshine!
Frequently Asked Questions
1. What is the best time to start beekeeping?
The best time to start beekeeping is in the spring when flowers are blooming and bees are naturally foraging. This gives your hive a good chance to establish a strong colony before winter hits.
2. How can I tell if my bees are healthy?
Healthy bees show consistent activity, have a good brood pattern, and are free of pests and diseases. Regular inspections will help you monitor their health over time.
3. How much honey can I expect to harvest?
The amount of honey you can harvest depends on the size of your hive, the strength of your colony, and the floral resources available. As a beginner, don’t expect a huge harvest your first year, but with care, your yield will grow!
4. Do I need to treat my bees for pests every year?
Yes, managing pests is an ongoing task. Regular checks and preventive measures are important for maintaining a healthy hive. Familiarize yourself with common pests and treatments that are suitable for your area.
5. Can bees survive without a beekeeper?
In the wild, bees can survive without human intervention. However, domesticated bees often require care and management to thrive, especially as they face challenges due to diseases, pests, and habitat loss.


