
Choosing the Right Design
Assessing Your Needs
When I first thought about building a chicken tractor, the first thing I had to do was figure out what I really needed. What’s the point of all that hard work if it’s not tailored to my situation? I considered the number of chickens I wanted to keep and how often I’d move the tractor. I also thought about whether I was keeping them primarily for eggs, meat, or both. Getting clear on my goals made the rest of the planning so much easier.
Next, I looked at my space. I live in a small homestead, so I had to be clever about maximizing my yard. How much area could I reserve for this portable setup? Would it fit between my garden beds and fruit trees? I sketched out different layouts, which really helped visualize how everything would work together.
Lastly, I thought about the climate where I live. It’s important to consider airflow and shelter when designing your tractor. If you live somewhere hot, you’ll need shade and ventilation. If you’re in a colder area, you want to ensure they’re protected from the harshest elements. Playing around with different designs became an enjoyable creative process for me!

Gathering Materials
Identifying Key Components
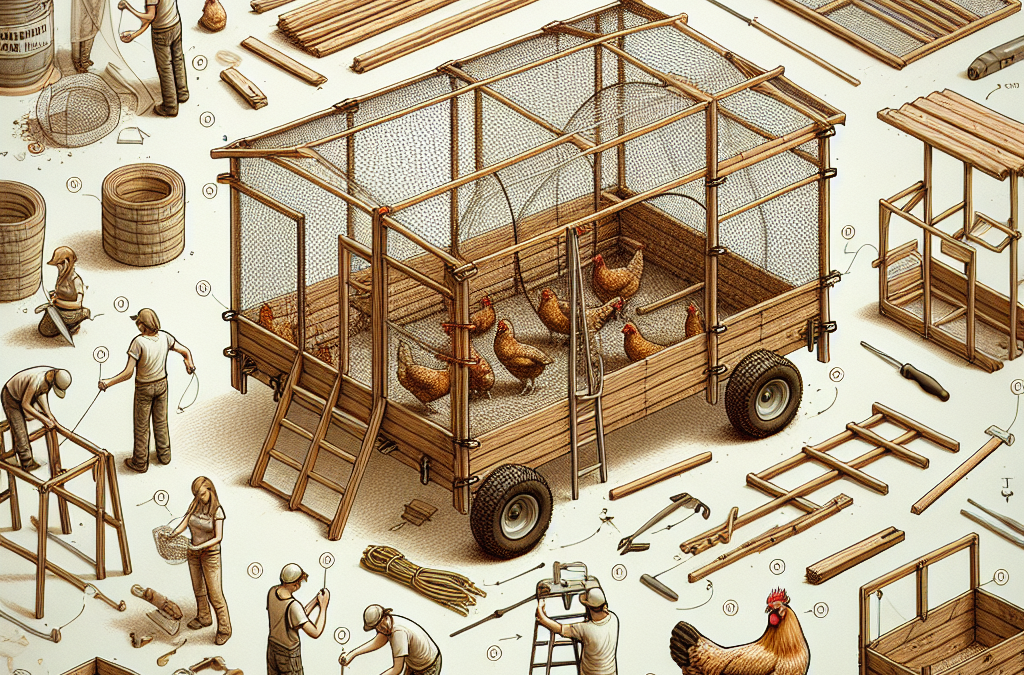
Once I knew what I wanted, the next step was gathering my materials. It’s like playing Tetris! You need to find just the right pieces to fit together. I went for basic lumber and wire mesh; you can’t go wrong with these staples. I also made sure to pick up some hinges and a latching mechanism for the door because, let’s be real, who wants chickens running amok in the backyard?
Don’t forget about the wheels! A portable chicken tractor needs to actually be portable, right? I snagged some sturdy wheels from a local hardware store. The last element I considered was insulation. Depending on your climate, you may need to add some wood shavings or straw to create a cozy bedding area for your feathery friends.
As I gathered my materials, I also kept the environment in mind. Salvaging wood or recycled materials can cut down costs and add character. More than once, I’ve looked at discarded pallets and thought, “Those would make a great chicken tractor!” It feels really good to reuse materials whenever possible.
Building the Structure
Step-by-Step Construction
Now comes the best part—building! With my plan in hand and materials laid out, I set to work. I started by framing the base of the tractor, making sure to measure twice and cut once. After all, nobody wants to redo work that could’ve been prevented. I used screws instead of nails to ensure everything stayed tight and sturdy.
Next up was the walls and roof. I went with a slanted roof design. It helps with rain runoff while also giving my chickens those sunny spots they crave. I installed the wire mesh around the sides, which is super important for keeping predators out. I made sure to hammer it down tightly. A little wiggle room could mean trouble!
Finally, I added a door. This was probably the most rewarding part—my vision was slowly turning into reality! For extra flair, I painted it in bright colors; it looks fantastic in my yard and it’s easy to spot in case I need to access it in a hurry.
Setting Up For the Chickens
Creating a Safe Environment
Now that the structure was built, it was time to prepare a welcoming home for my chickens. I started with clean nesting boxes, which I scattered hay into for comfort. Keeping a clean area is a must; nobody wants to deal with a smelly mess while nurturing their flock!
I also filled up their feeders and waterers. I chose an automatic waterer to keep me from needing to refill it constantly. After that, I added some perches to let them roost at night. Chickens love to have spaces to perch on, and it gives them a sense of security.
Finally, I made sure the area was as predator-proof as I could manage. I laid wood shavings on the ground to deter pests and make it comfy underfoot for my birds. They deserve a safe, happy place to live—after all, it’s their home now too!
Maintaining Your Chicken Tractor
Regular Care and Upkeep
Once everything was set up and the chickens were happily exploring their new digs, I quickly learned the importance of regular maintenance. I check the tractor at least once a day. This keeps me in the loop about their health and behavior and prevents any potential issues before they occur.
I clean the area every week. It sounds tedious, but it’s important to scoop out the waste and replace bedding. I’ve made it a routine part of my week, and the payoff is worth it. Fresh, clean environments keep my chickens happy and healthy, which ultimately means more eggs!
Lastly, I move the tractor every few days to give my chickens fresh grass to peck at. This is essential for their diet and well-being. Each move means they get new scratch areas to explore, plus it helps keep unwanted pests at bay in the yard.
FAQs
1. How much space do I need for a chicken tractor?
It really depends on the number of chickens you plan to keep. A good rule of thumb is to allow about 4 square feet per chicken. This will ensure they have enough space to roam, eat, and relax.
2. Can I use recycled materials to build my chicken tractor?
Absolutely! Recycling materials can save money and give your tractor a unique look. Just make sure the materials are safe for the chickens and are not treated with harmful chemicals.
3. How often should I move the chicken tractor?
It’s best to move the chicken tractor every few days to a week. This gives the chickens access to fresh forage while also helping manage the grass and weeds in your yard.
4. Do I need to provide heat for my chickens in winter?
Typically, chickens can handle cold weather quite well, but if you live in an extremely harsh climate, you may want to provide some insulation. Also, ensure they have a dry and draft-free area to roost at night.
5. What should I feed my chickens?
Chickens do well on a balanced diet of commercial feed, supplemented with kitchen scraps, grains, and vegetables. Make sure they always have access to fresh water, too!


