
Understanding Your Materials
Types of Clay
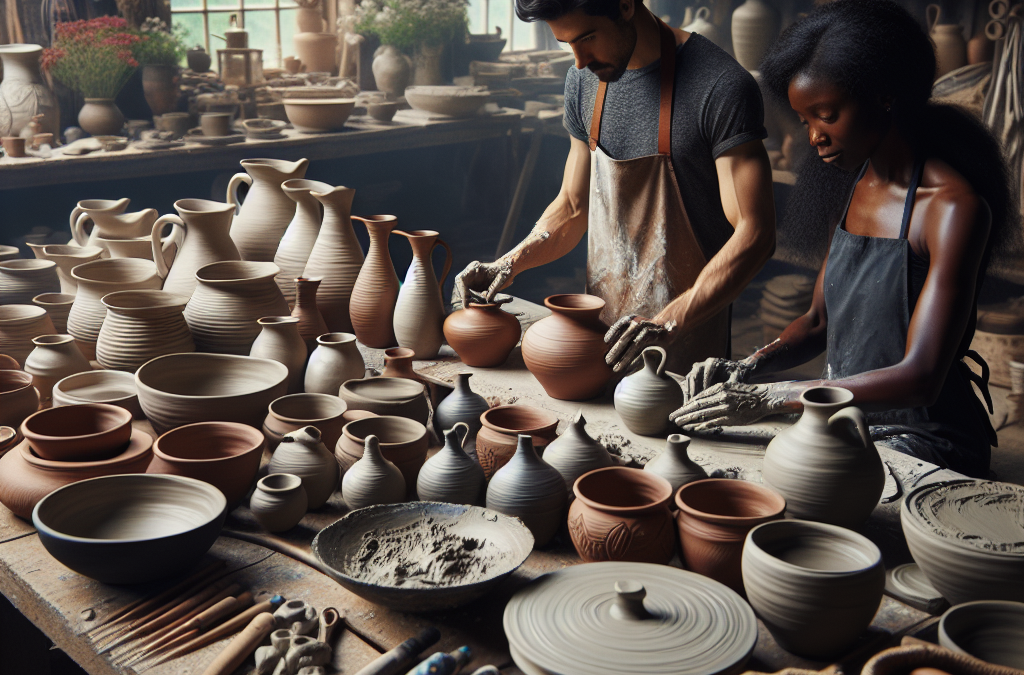
When it comes to making pottery, you’ve got to know your clays. Different types of clay have unique properties and will dramatically affect your finished product. From stoneware to earthenware, each type has its charm! Personally, I love using stoneware because it’s durable and great for functional pieces that can be used daily.
Another thing to think about is local clay. I remember my first attempt at pottery—what a mess! I tried using some clay from my garden without knowing it contained too much grit. It’s essential to source quality materials; consider visiting local pottery supply stores or even your neighbor’s homestead who might have a stash.
Don’t forget about additives like grog and colorants! They can change the texture and appearance of your final piece. So, mix and match until you find what works best for you and suits your style. There’s nothing like sifting through materials and experimenting to find that perfect blend!

The Pottery Wheel and Hand-Building Techniques
Getting Started with the Wheel
If you’re new to pottery, the wheel might look intimidating but don’t sweat it! My first few tries were laughable! I’d get bits of clay flying everywhere, but with practice, I gradually got the hang of it. The wheel is fantastic for creating symmetrical pieces, which is super satisfying once you master it.
Start by centering your clay on the wheel—this can be a bit of a struggle at first. Just remember, it’s all about finding that sweet spot. You’ll quickly learn the gentle pressure and speed needed to keep your clay from wobbling out of shape. It took me weeks, but when I finally pulled my first functional bowl, I was over the moon!
Once you’ve got your center down, the world is your oyster! You can throw anything from mugs to vases. Don’t be afraid to be bold with your designs—sometimes unconventional pieces can become the favorites! Just take it one small step at a time, and enjoy the process!
Firing Your Work
Understanding the Kiln
This part is key! After you’ve molded your pieces, they need to be fired in a kiln to get that tough exterior. I remember being so anxious the first time I loaded my kiln! Will everything survive? Will it all explode? Thankfully, I learned that patience is crucial at this stage.
There are different firing techniques—like bisque and glaze firing—and understanding these can make your clay creations even better. Bisque firing prepares the clay to hold glazes, while glaze firing helps develop that shiny finish you want. My first glaze was way off, but it’s all part of the learning experience! Just keep trying until you get that “wow” factor.
Lastly, kiln temperatures vary based on the clay and glaze type. You’ll want to keep a good notebook to track what works for you, including firing temperatures and results. You don’t want to repeat my mistake of assuming everything would work perfectly without a plan. Keep experimenting, and you’ll soon find your ideal firing process!
Glazing Techniques
Choosing Your Glazes
Once your pots are fired and all set, get ready to dive into the world of glazes! This part is like painting your masterpiece! There are sooo many colors and textures to pick from, and each glaze reacts differently during the firing. My favorites have been the ones that change colors based on the thickness—such a nifty surprise!
Don’t just stick to the tried and true! Explore the magic of layering glazes; they can give your pieces depth. Just remember to jot down what you use, as it makes re-creating your best work a breeze. I had a glaze once that turned into a lovely speckled finish—definitely a happy accident!
Also, technique is everything. Whether you dip, pour, spray, or brush glaze, every method leads to different results. Personally, I love the dipping technique—it’s quick and gives a nice even coverage. But hey, don’t be afraid to experiment; that’s how I found my personal style!
Marketing Your Pottery
Setting Up Shop
Now that you have your functional pieces, let’s get them out there! Setting up shop can be the cherry on top after all that hard work. Whether you decide to hit up local markets, create an online store, or even sell through social media, make sure to showcase your unique voice and personality.
Get creative with how you present your pieces. Good photos are crucial! Natural lighting works wonders and shows off the textures and colors beautifully. I found that setting my pottery outside in the garden created a delightful backdrop that really sold my work!
Networking is essential too—don’t shy away from connecting with fellow creators. Attend local art shows, connect online, and join pottery groups. You’d be surprised at how much support you can receive, and many will be willing to share their tips on what’s worked (or hasn’t) for them in marketing. It’s a community, so embrace it!
FAQ
1. What type of clay should I start with as a beginner?
Starting with stoneware is usually a great choice because it’s forgiving and durable. It allows you to make functional pieces that can be used every day! Keep an eye out for earthenware too, which can be fun for decorative items.
2. Do I need a pottery wheel to make pottery?
Nope! You can create beautiful pottery by hand without a wheel using techniques like pinch pots or slab building. The wheel is just one of many ways to express your creativity!
3. How do I know when my kiln is ready for my pots?
A good rule of thumb is to follow the manufacturer’s instructions. Be patient—you’ll need to wait for the kiln to cool before opening it. If you’re unsure, keep experimenting until you get comfortable with your specific kiln! Patience is key.
4. How important is marketing for my pottery business?
Marketing is essential to get your work seen by potential customers. Building connections, using social media, and presenting your pieces well can really boost sales and help you grow as an artist.
5. Can I use my pottery pieces for food?
Absolutely—once properly fired and glazed, many types of pottery can be used safely for food. Just check that the glazes you’re using are food safe, and you’ll be all set to enjoy your beautiful creations!


