
Mold and Mildew Infestation
Recognizing Mold and Mildew
Mold and mildew are sneaky little devils. They thrive in dark, damp places and can spread quickly. On my homestead, I’ve had my fair share of run-ins with these unwanted guests. If you see black or green spots on your food, or notice a musty smell, chances are mold and mildew have taken over.
Keeping an eye out for these signs is crucial. Mold can start as just a tiny spot, but it expands rapidly if not dealt with immediately. Trust me, it’s better to catch it early. I’ve lost too many jars of my favorite preserves because I didn’t notice the signs in time.
It’s not just the visible mold you need to worry about. Have you ever opened a jar of salsa, only to be hit by a foul smell? That’s mold’s less-visible warning. If your nose detects something off, it’s best to toss it out right away.

Preventing Infestation
Prevention is the best defense against mold and mildew. In my experience, the key is proper storing techniques. Make sure your storage areas are cool and dry. I’ve installed a small dehumidifier in my pantry to keep the moisture levels down.
Another tip is to use airtight containers. You wouldn’t believe how much difference a quality seal can make. I learned this the hard way after losing several batches of homemade granola. Since switching to airtight jars, I haven’t had any issues.
Regular cleaning can’t be stressed enough. Wipe down your shelves and containers once a month. This routine has helped me keep mold at bay and my food fresher for longer.
Dealing with Contamination
If you do find mold or mildew, don’t panic. The first step is to isolate the contaminated items to prevent the spread. I’ve made it a habit to place such items in a separate bin until I decide what to do with them.
Next, clean the affected area thoroughly. I use a mixture of vinegar and water. It’s natural and effective. Just spray the area and wipe it down. If the mold is persistent, I switch to a stronger solution, but vinegar works wonders for light cases.
Finally, review your storage practices. Molded foods usually mean something went wrong in storage. Check if your shelves are too close to a heat source or if there’s a hidden moisture leak somewhere. Adjusting these factors has helped me minimize future contamination tremendously.
Pest Problems
Identifying Common Pests
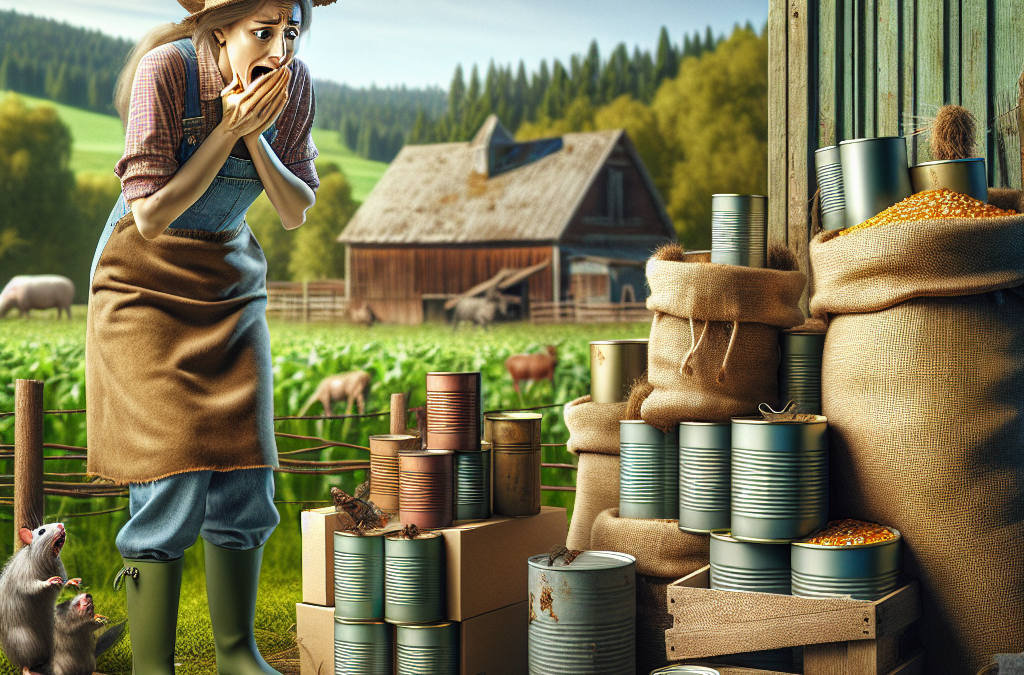
Pests, yuck! They’re the bane of every homesteader’s existence. From rodents to insects, there’s no shortage of creatures trying to snack on your stored goods. I’ve had mice get into my grains, and let me tell you, it’s a nightmare.
The first step to tackling pests is identifying them. Look for signs like droppings, gnaw marks, or even a hole in your cereal box. I once found a trail of sugar ants leading straight to my honey jar. Thoroughly inspecting your pantry regularly helps catch these critters early.
Knowing what pests you’re dealing with also helps you find the right strategy. Rats? You might need traps. Ants? Bait is your best bet. Different pests need different tactics, so understanding their habits becomes crucial.
Preventative Measures
Prevention comes next. Make sure your food is stored in pest-proof containers. Metal and thick plastic are my go-tos. I had my fair share of critters chewing through thin plastic. Not anymore since I upgraded my storage.
Sealing gaps and cracks around your storage areas can also make a huge difference. A friend recommended using steel wool to plug gaps, and it’s been a game-changer. Those little openings are basically invitations for pests.
Safer pest repellents like bay leaves or essential oils can also deter pests. I sprinkle bay leaves around my pantry, and it seems to keep the bugs at bay. Plus, it gives the whole area a nice, earthy smell.
Managing an Infestation
If prevention fails and you find yourself amid an infestation, it’s time to act fast. First, remove any heavily infested items. It’s hard, but sometimes purging is necessary to protect the rest of your stash.
Next, set traps or bait as needed. For instance, I use humane traps for rodents and sugar ant bait stations for insects. Regularly checking these traps is essential to manage the population effectively.
Finally, deep cleaning is your best friend. Thoroughly sanitize the affected area to get rid of any pest remnants or attractants. Implement improved storage and sealing techniques to prevent a repeat infestation.
Nutrient Loss
Understanding Nutrient Degradation
Nutrient loss is a lesser-known danger of improper food storage. Heat, light, and air are the culprits that rob your food of its nutritional value. I learned this the hard way after discovering my beautifully jarred veggies had lost their vitality.
Understanding how nutrients break down over time is crucial. Vitamins like C and A are particularly sensitive to light and air. Keeping food away from these elements can help maintain their goodness longer. It’s not just about taste; it’s about health too.
Moreover, overexposure to light can also lead to photodegradation. This process breaks down the nutritional components, significantly lowering their benefits. To combat this, I’ve switched to opaque or tinted storage containers.
Optimal Storage Conditions
Creating optimal storage conditions is key. My pantry is cool, dark, and well-ventilated. I’ve even invested in blackout curtains to keep sunlight at bay. Those small changes make a big difference in preserving nutrients.
Temperature control is also important. High temperatures can speed up nutrient loss. I use a thermometer to monitor my storage areas and adjust as needed. Ideally, storing food below 70°F helps prolong its shelf life.
Reducing air exposure also helps. Vacuum sealing or using oxygen absorbers can do wonders. The less air in contact with your food, the better its nutritional integrity remains. These small investments have paid off for me in spades.
Rotating Food Storage
Regularly rotating your food storage ensures you use up items before they lose their nutritional punch. I have a simple first-in, first-out system that helps keep track of older items. It requires some discipline, but it’s well worth it.
Checking expiration dates and conducting periodic audits of your pantry helps too. I make it a point to use up older stock first while keeping a close eye on newer additions. This habit has become second nature to me.
Being aware of shelf lives is also important. Different foods have varying storage times. Understanding these timelines helps me plan my meals better, minimizing waste and ensuring we’re always eating the freshest and most nutritious options available.
Health Risks
Foodborne Illnesses
Improper food storage can lead to health risks, notably foodborne illnesses. Bad storage conditions can foster bacteria like Salmonella or E. coli, which can make you seriously sick. I’ve gotten food poisoning before, and trust me, you don’t want to go through that.
First things first, always store perishable items in the fridge. Following the “danger zone” rule of keeping food out of temperatures between 40°F and 140°F helps in preventing bacterial growth. These little guys love moist, warm environments.
Also, make sure to consume foods within their intended shelf life. Just because something looks okay doesn’t mean it’s safe to eat. Trust your instincts and err on the side of caution when in doubt.
Chemical Contaminants
Chemical contaminants are another worry. Improper storage can lead to chemical leaching, especially if you’re using non-food-safe containers. I’ve learned to be extra careful with plastics and to always use containers marked as food-safe.
Pay attention to storage materials. Glass is generally safe and doesn’t react with food. Plastics can sometimes release harmful chemicals when they degrade. Stick to high-quality, food-grade options to play it safe.
Additionally, be wary of strong cleaning agents. Ensure they’re properly rinsed off from containers and storage areas. Organic or food-safe cleaning solutions are a better bet. Keeping your storage area toxin-free is just as important as the food itself.
Regular Health Monitoring
Regularly monitoring your health can alert you to any potential issues from food storage. Keep an eye out for symptoms like stomach pain, nausea, or fevers after eating. These are signs that something might be off.
If you suspect foodborne illness, consult a healthcare professional immediately. Early diagnosis and treatment are key. I once waited too long and it took forever to recover. Don’t make the same mistake as me.
Finally, educating everyone in your household about proper food storage helps too. The more knowledgeable everyone is, the better. Share tips and tricks, and make sure everyone understands the importance of good practices. Teamwork goes a long way in keeping everyone healthy.
FAQ
What are the signs of mold and mildew in food storage?
Signs of mold and mildew include black or green spots on food, a musty smell, and sometimes a foul odor when opening containers. Regular inspections are key to catching these early.
What are effective ways to prevent pests in food storage?
Using pest-proof containers made of metal or thick plastic, sealing gaps and cracks, and using natural repellents like bay leaves or essential oils can help keep pests away.
How can I reduce nutrient loss in my stored food?
Store food in cool, dark, and well-ventilated areas. Use opaque containers to block light and consider vacuum sealing or using oxygen absorbers to reduce air exposure.
What health risks are associated with improper food storage?
Improper food storage can lead to foodborne illnesses caused by bacteria like Salmonella and E. coli. Chemical contaminants from non-food-safe containers and improper cleaning can also pose health risks.
Related Content
- Home Farming 101: Getting Started with Gardening, Composting, and Sustainable Living
- Reviewing Some Steps to Effective Composting
- Why You Should Consider Beekeeping as a Hobby (and How to Get Started
- Grow Your Own Food with These Simple Organic Gardening Tips
- Develop a Homestead for Generational Sustainability


