
Table of Contents
- Soil Preparation Techniques
- Crop Rotation and Companion Planting
- Natural Pest Control Methods
- Composting and Fertilization
Soil Preparation Techniques
Understanding Your Soil Type
When it comes to organic gardening, the first thing I always recommend is understanding your soil. Different plants thrive in different soil types, so getting to know what you’re working with can make a world of difference. You can start by doing a simple test to see if you have sandy, loamy, or clay soil. Each type has its own perks and drawbacks, but don’t let that discourage you—every type can be improved with the right techniques.
For instance, if you’ve got sandy soil, it drains water quickly and warms up faster in the spring. The downside is, it can lack essential nutrients and organic matter. On the other end, clay soil retains moisture quite well, but it can be heavy and hard to work with. Loam, well, it’s the gold standard—a balanced mix where plants generally thrive.
Once you’ve identified what soil you have, you can start amending it to suit the needs of your crops. Adding organic matter is almost always beneficial, whether it’s compost, aged manure, or leaf mold. These additions improve soil structure and nutrient content, making it easier for your plant roots to dig in and thrive.

Testing and Amending pH Levels
Next up on the agenda is pH levels. I can’t stress enough how important this is, yet so many people overlook it. Most vegetables prefer a slightly acidic to neutral pH range, around 6.0 to 7.0. If your soil’s pH is off, it can seriously impact nutrient availability, and no amount of fertilizer will fix that.
To test your soil’s pH, you can use a simple home testing kit. These kits are easy to use and give you a good starting point. If your soil is too acidic (low pH), you can add lime to bring it up. Conversely, if it’s too alkaline (high pH), sulfur or peat moss can help lower it. It takes a bit of time for the amendments to take effect, so it’s a good idea to test a few months before you plan to start planting.
When you’re amending the soil, remember to mix things in thoroughly. You want your soil to be uniform throughout the garden bed. Also, be patient; it might take a season or two to get things just right, but your plants will thank you for it.
Building Raised Beds
If you’ve got soil that’s particularly difficult to work with, building raised beds can be a game-changer. Raised beds bring the growing area up to a higher level, which can be easier on your back and better for your plants. They warm up more quickly in the spring and provide better drainage, both of which can lead to a longer growing season.
Another plus is that you can fill raised beds with the perfect soil mix from the start, avoiding issues with poor native soil altogether. A mixture of good-quality topsoil, compost, and well-rotted manure usually works wonders. These beds are also great for organizing crops and can help in implementing companion planting strategies.
Building a raised bed is a straightforward DIY project. You can use materials like rot-resistant wood, bricks, or even recycled materials. Just make sure they’re safe and not treated with chemicals that could leach into the soil. Once built, you’ll find that maintaining and harvesting from raised beds is a whole lot easier and more rewarding.
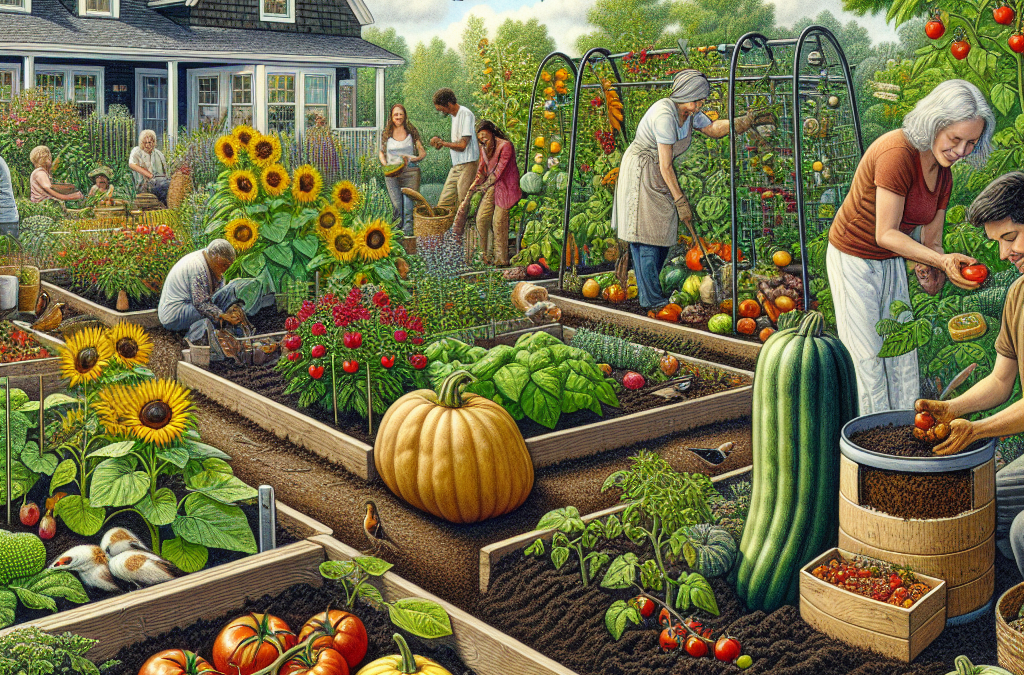
Crop Rotation and Companion Planting
The Benefits of Crop Rotation
Crop rotation is one of those practices that I’ve found to be incredibly beneficial in organic gardening. It’s all about not planting the same type of crop in the same place year after year. Different plants pull various nutrients from the soil and can, if planted repeatedly in the same spot, deplete those nutrients. Crop rotation helps keep everything balanced.
For example, legumes like beans and peas actually add nitrogen to the soil, making it richer for the next crop. If you follow these nitrogen-fixing plants with heavy feeders like tomatoes or corn, you’ll get a much better yield. It’s a harmonious cycle that makes your garden more productive and healthier overall.
Another advantage is disease and pest control. Many pests and diseases are host-specific, meaning they prefer certain types of plants. By rotating crops, you can disrupt their life cycles and keep them from establishing a foothold in your garden. It’s a natural way to manage garden problems without relying on chemicals.
Understanding Companion Planting
Companion planting is a strategy that can significantly boost plant health and growth. It’s all about growing plants together that mutually benefit each other. Some plants release chemicals that repel insects, while others can provide ground cover to keep weeds down or shade to protect more delicate plants.
Take the classic example of the “Three Sisters” method—corn, beans, and squash. Corn provides a natural trellis for beans to climb. Beans improve the soil with nitrogen, and squash spreads out, acting as a living mulch to keep weeds at bay. When done right, the whole system works together beautifully.
Another combo I love is planting basil alongside tomatoes. Basil helps repel pests that love tomatoes and improves the flavor of the fruit. Marigolds are another great companion; they’re known to deter nematodes and other garden pests. The possibilities are nearly endless and can make your garden a more vibrant and productive place.
Planning Your Garden Layout
Planning your garden layout with rotation and companion planting in mind can take a bit of effort, but it’s well worth it. I like to start with a simple sketch of my garden space, noting where the sun hits and any existing structures like fences or trees that might provide shade.
Once you have a rough map, start plotting out where each plant will go. Consider the needs of each plant—things like sun exposure, water needs, and spacing requirements. Slot in your companions next to each other and rotate your crops from where they were the previous year.
Remember to leave some space for paths or walkways so you can easily access all parts of your garden. A well-thought-out plan makes planting, maintaining, and harvesting much more manageable. Plus, it helps ensure you’re getting the most out of your space and efforts.
Natural Pest Control Methods
Identifying Common Garden Pests
One of the first steps in natural pest control is identifying the common pests that can wreak havoc in your garden. Get to know your unwelcome visitors; it’s easier to control something when you know what you’re dealing with. Some of the usual suspects in vegetable gardens include aphids, caterpillars, and tomato hornworms.
Aphids are tiny, pear-shaped insects that cluster on the leaves and stems of plants. They suck the sap and can cause plants to wilt and die if left unchecked. Caterpillars, especially those from moths and butterflies, munch through leaves at an alarming rate. And then there are the hornworms—big, green, and loves tomatoes.
Knowing what pests are present helps you choose the right method to deal with them. Take the time to inspect your plants regularly, especially the undersides of leaves, where many pests like to hide. The sooner you catch an infestation, the easier it will be to handle.
Using Beneficial Insects
One of the greatest allies in the war against garden pests is beneficial insects. These are the good guys that prey on or parasitize the pests you’re trying to get rid of. Ladybugs, for example, are voracious aphid eaters. One ladybug can consume as many as 50 aphids a day!
Lacewings and their larvae are another favorite. They feed on a wide range of pests, including aphids, caterpillars, and mites. And then there are parasitic wasps, which lay their eggs inside caterpillars or aphids. The larvae then consume the host from the inside out—nature can be brutal, but effective.
You can attract beneficial insects by planting specific flowers and herbs, like dill, fennel, and yarrow. These plants provide nectar and pollen, which attracts the good bugs. Alternatively, you can purchase beneficial insects from garden supply stores. Releasing them in your garden can give you a head start on pest control.
Homemade Natural Pesticides
If you’re dealing with a pest problem that can’t be managed by beneficial insects alone, homemade natural pesticides can come to the rescue. These are usually safer for you, your plants, and the environment than their chemical counterparts. Plus, they’re easy to make with ingredients you probably already have at home.
Neem oil is one of my go-tos. It’s derived from the neem tree and works by disrupting the life cycle of pests. Mix a small amount with water and a few drops of dish soap, then spray it on affected plants. It’s non-toxic to humans and pets, but devastating to pests.
Another option is a garlic and chili spray. Blend a few cloves of garlic and some hot peppers with water, then strain the mixture and add a drop of dish soap. It’s a potent deterrent for many pests. Just remember to test any homemade spray on a small part of the plant first to ensure there’s no damage, and reapply after rain.
Composting and Fertilization
The Basics of Composting
Composting is like magic for your garden. It transforms kitchen scraps and yard waste into nutrient-rich organic matter that can vastly improve your soil. Starting a compost pile is easy, and the benefits are immense. All you need is a dedicated space for your pile or bin and a mix of ‘greens’ and ‘browns.’
Greens are nitrogen-rich materials like fruit and vegetable scraps, coffee grounds, and grass clippings. Browns provide carbon and include things like dried leaves, straw, and paper. Aim for a balance between the two to keep your pile healthy and decomposing efficiently.
Turn your pile regularly to aerate it and speed up decomposition. You’ll know your compost is ready when it’s dark, crumbly, and has an earthy smell. Spread it over your garden beds or mix it into the soil for a nutrient boost that your plants will love.
Making Your Own Fertilizer
If you’ve ever bought organic fertilizer, you know it can be pricey. The good news is, you can make your own with a few simple ingredients. One of my favorite recipes is a compost tea. It’s basically a liquid extract of compost that you can use to water your plants for an extra nutrient kick.
To make compost tea, place a couple of shovelfuls of well-aged compost into an old pillowcase or burlap sack. Tie it up and place it in a container filled with water. Let it steep for a few days, stirring occasionally. Once it’s ready, dilute it to the color of weak tea and use it to water your plants.
Another great homemade fertilizer is a fish emulsion. Blend up whole fish or fish scraps with water, let it ferment for a couple of weeks, and then strain it. This smelly concoction is fantastic for leafy greens and other nitrogen-loving plants. Just be sure to dilute it well before using it, as it’s quite potent.
The Importance of Mulching
Last but certainly not least, let’s talk about mulching. Mulch is an unsung hero in organic gardening. It helps retain soil moisture, suppress weeds, and can even prevent disease. Organic mulches like straw, grass clippings, and wood chips also break down over time, adding organic matter to the soil.
One of the easiest ways to mulch is by laying down a thick layer of straw or grass clippings around your plants. Aim for about 2-4 inches deep, but be careful not to let it touch the plant stems, as this can sometimes lead to rot. As the mulch breaks down, it feeds your soil and plants.
If you’re dealing with persistent weeds, try using a sheet mulch approach. Lay down cardboard or several layers of newspaper, then cover it with organic mulch. This double layer blocks light, starving weeds of the energy they need to grow, while improving your soil over time. It’s a win-win situation.
FAQ
1. What is the best soil type for organic gardening?
Loam is generally considered the best soil type for organic gardening due to its balanced texture and nutrient content. However, with proper amendments, both sandy and clay soils can be made suitable for organic gardening.
2. How often should I rotate crops?
It’s best to rotate crops every year, following a three- or four-year cycle if possible. This helps prevent soil depletion and reduces the risk of pests and diseases.
3. Are there any plants that should not be planted together?
Yes, some plants can negatively affect each other when planted together. For example, beans and onions do not make good companions. It’s important to research the plants you intend to grow and plan your garden layout accordingly.
4. How do I know when my compost is ready?
Compost is ready to use when it is dark, crumbly, and has an earthy smell. This process can take anywhere from a few months to a year, depending on factors like pile size, materials used, and how often it is turned.


