
Understanding the Basics of Worm Farming
What Is Worm Farming?
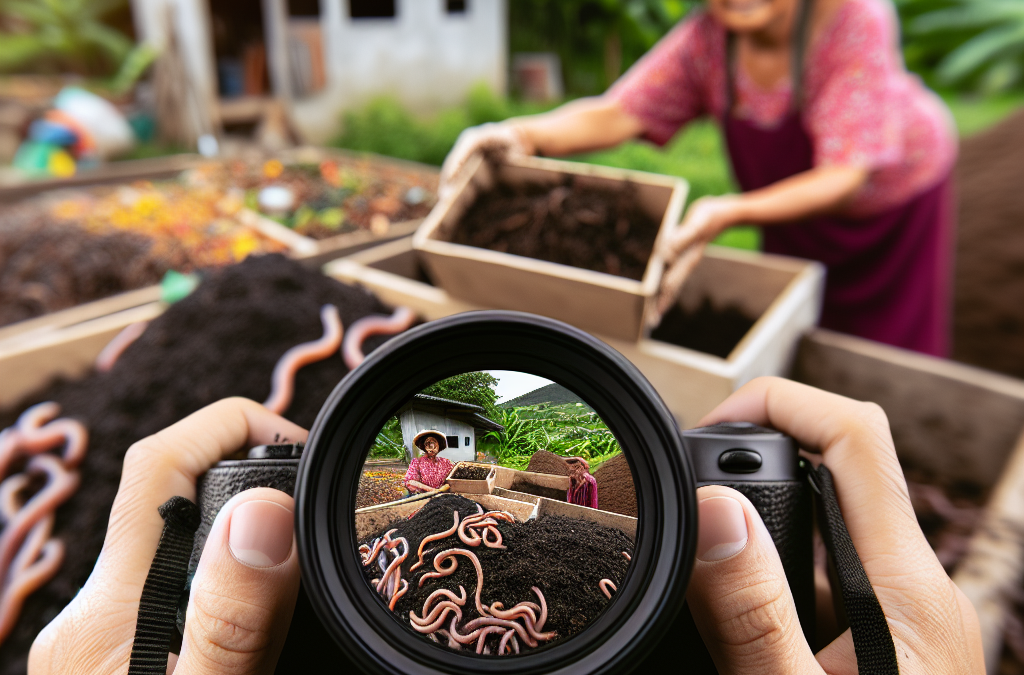
Worm farming, often referred to as vermiculture, is a fantastic way to recycle organic waste into rich compost. I stumbled upon it after facing a mountain of kitchen scraps and yard waste, and boy, it turned out to be a real game-changer.
In essence, we’re cultivating worms that munch on our biodegradable waste, turning it into nutrient-dense soil. With just a little setup, these little guys can handle tons of waste while saving us money on fertilizers. Plus, it’s so cool to see the entire process unfold, almost like magic right in your backyard!

This isn’t just a trend; it’s an eco-friendly solution to the growing waste problem we face today. We can reduce landfill waste while producing this ‘black gold’ for our gardens – what’s not to love?
Why Choose Worm Farming?
One of the biggest reasons I chose worm farming was its efficiency. Worms can digest waste and produce compost quickly, unlike traditional composting methods that can take months. This means less time waiting and more time enjoying the fruits (and veggies) of your labor!
Moreover, it’s an effortless way to contribute positively to the environment. For every worm that thrives, we’re reducing carbon footprints and maximizing our waste management. I mean, who wouldn’t want that?
Lastly, there’s a certain joy that comes from nurturing these resilient creatures. I find it incredibly rewarding to watch the worms work diligently, knowing that I’m not just cleaning up waste but also contributing to a bigger ecological cycle.
Choosing the Right Worms
Not all worms are created equal when it comes to vermiculture. Red wigglers (Eisenia fetida) are my personal favorites; they’re high performers and thrive in composting conditions. They can eat half their weight in food daily, which is impressive considering their tiny size.
When choosing your worms, look for healthy ones that are wiggly and active. Stale or sluggish worms are a sign of stress or unhealthy conditions. I remember my first experience; I ordered worms online and was amazed at how lively they were upon arrival.
Don’t forget, it’s also essential to maintain the right conditions for these lil’ guys—proper moisture and temperature can make all the difference in their happiness and productivity.
Setting Up Your Worm Bin
Choosing a Location
When I first started worm farming, one of the most crucial steps was picking the right spot for my worm bin. Worms love humidity and dark spaces, so I decided on a partially shaded area on my patio that stays cool.
An out-of-sight, out-of-mind approach is necessary, as these residents won’t be the most beautiful part of your outdoor decor. Just make sure they’re protected from extreme temperatures, rain, and predators like birds and raccoons; trust me, they won’t hesitate to snack on your worms!
As my setup evolved, I realized that keeping them close by means I can check on them frequently, making worm farming not just a project, but a daily joy.
Building or Buying a Worm Bin
You can either buy a ready-made worm bin or get crafty and make your own. I chose to DIY mine! With just a plastic storage tote, I created a fantastic worm habitat. Just drill a few holes for aeration and drainage, and voila, my composting home was ready.
If you opt to buy, plenty of options are available online or at garden centers. Just ensure it provides enough space for your worms to thrive and has good ventilation. Reading reviews helped me pick the best one!
Designing the bin according to your space and worm population needs will optimize their habitat. Remember, a well-kept worm bin leads to happy, productive worms.
Preparing the Bedding
Worms need a cozy home; think of it as their bed. The bedding needs to be moist, yet not soggy, and a mix of shredded newspaper, cardboard, or coconut coir works wonders. I once used too much leftover food without ensuring proper bedding and learned the hard way: a soggy mess isn’t appealing!
You want to aim for a depth of around 8 to 12 inches for the bedding, as this provides ample space for the worms to burrow and munch away. Mixing in crushed eggshells is also a great idea to add calcium to their diet. Plus, it helps to balance the acidity!
After laying down the bedding, I make it a point to dampen it lightly with water. Worms thrive in moist environments, and this little extra care keeps them happy and productive.
Feeding Your Worms
What to Feed Your Worms
Feeding my worms was one of the most enjoyable aspects of my worm farming journey. I quickly learned that they thrive on kitchen scraps—veggie peels, coffee grounds, and even crushed eggshells were solid go-tos.
However, I avoid meat, dairy, and processed foods. These can attract unwanted pests and create odors, which can absolutely be a bummer. A good rule of thumb is to feed them about half their body weight in food weekly—this keeps them happy and helps minimize waste effectively.
Every time I add a fresh layer of food, I feel like I’m treating them to a special buffet, and they sure do appreciate it, squirming right into the food!
How Much to Feed
I’ve found that overfeeding can lead to a messy bin with foul odors, so I’ve developed a bit of a feeding schedule. I typically check the bin every few days and only add food once the old scraps are mostly gone.
A handful of food weekly can be a great starting point, adjusting based on how quickly they seem to be processing it. If you notice leftover food, cut back a bit; they’ll thrive better that way.
Remember, worms can also go a few weeks without food, so if you’re planning a vacation, don’t worry too much – they’ll be just fine!
Monitoring and Adjusting Feeding Practices
Keeping an eye on the bin’s conditions is key: is it too wet? Too dry? Adjusting your feeding habits will be necessary as you learn. When I first started, I overfed them and dealt with some odors; I quickly figured it out.
Using a balance of green (nitrogen-rich) and brown (carbon-rich) scraps can keep the bin healthy. If things get too damp, I’ll add more dry bedding material. It’s all about learning and growing, right along with your worms!
Maintaining a keen observation on their happiness—like how they’re wiggling and consuming food—can guide you in optimizing care.
Harvesting the Worm Castings
When to Harvest
After several months of dedicated worm farming, I got to the exciting part: harvesting those lovely worm castings! Typically, you can start harvesting after about three to six months. It’s often clear when the bedding is mostly broken down and the castings are plentiful.
What I usually do is push all the contents to one side of the bin, introduce fresh bedding on the other, and start feeding there. The worms will naturally migrate to the new spot, making it easier to collect the castings from the other side.
Timing was everything; finding this rhythm in harvesting not only keeps the worms healthy but also provides me with rich compost for my garden.
How to Harvest
Harvesting can be a bit of a messy task, but it’s so rewarding! I usually wear gloves and place a tarp or cardboard underneath to catch any stray castings. Gently removing the compost from the bin, being careful to avoid damaging the worms, is essential.
Sifting through to separate the worms from the castings can be delightful. I often mix the freshly harvested castings with some new bedding and return any worms back to their home. It’s all part of maintaining a thriving ecosystem.
It’s become almost a ritual for me, where I feel the satisfaction of providing for my garden while nurturing my worm community.
Using and Storing the Castings
Once I have my hands on the beautiful worm castings, I like to use them right away! They are fantastic for boosting my garden plants. I often mix them into soil when planting and sprinkle around existing plants for an extra nutrient boost.
If for some reason I can’t use them immediately, I store the castings in a cool, dark place in an airtight container. I’ve found that keeping them dry until I’m ready ensures they don’t lose any potency.
These castings are pure composting magic – they enhance soil structure, boost nutrient availability, and help retain moisture. Using them has transformed my garden; everything flourishes!
Maintaining Your Worm Farm
Best Practices for Sustainability
After some time, I realized that sustaining my worm farm requires regular upkeep. Routine checks mean I can keep track of moisture levels, food supply, and overall worm health.
I also switched to using only organic kitchen scraps to ensure the health of my soil and worms. Each small adjustment has led to better outputs and happier worms. It’s amazing to think how proactive care leads to a thriving habitat!
Keeping a journal helps me remember what works and what doesn’t. It’s a learning experience, one that’s honestly rewarding every step of the way.
Dealing with Common Problems
Sometimes my worm farm faced challenges, such as odors or pests. I learned that maintaining proper moisture and avoiding overfeeding usually does the trick. If you’re not careful, those pesky fruit flies might show up uninvited!
Utilizing neem oil sprays helped keep the pests at bay, but I always aim for natural solutions first. Observation and adaptability have become my best friends in solving any problem.
Staying attuned to what’s working allows me to quickly fix any issue, ensuring my worm farm keeps flourishing.
Expanding Your Worm Farming Journey
Once you’ve mastered these basics, the world of worm farming expands so much! I eventually explored different types of vermiculture, like outdoor composting systems or even anaerobic worm systems.
This journey has also ignited my passion for educating others. Hosting workshops in my community has been a fulfilling way to share what I’ve learned and encourage more people to join the vermiculture revolution.
You quickly realize just how empowering it feels to take control of waste management in a sustainable way. It feels great and truly gives a sense of accomplishment.
Frequently Asked Questions
1. Can you really compost all kitchen scraps with worms?
While worms love a variety of scraps, it’s essential to avoid meats, dairy, and oily foods. Stick with veggie peels, coffee grounds, and fruits for a balanced diet.
2. Do worms need light or dark conditions to thrive?
Worms prefer dark, moist conditions. Keeping them in a shaded area and making sure their bin is covered will help them stay happy.
3. How can I tell if my worms are healthy?
Healthy worms will be active and wiggly. If they’re sluggish or dead, it might suggest overfeeding or poor conditions.
4. What should I do with the composted worm castings?
Worm castings make excellent organic fertilizer and can be used in your garden to boost plant growth and improve soil health.
5. Can I leave my worms unattended for a while?
Yes, worms can go a few weeks without food. If you’re planning a trip, just ensure they have enough bedding and they should be fine!


