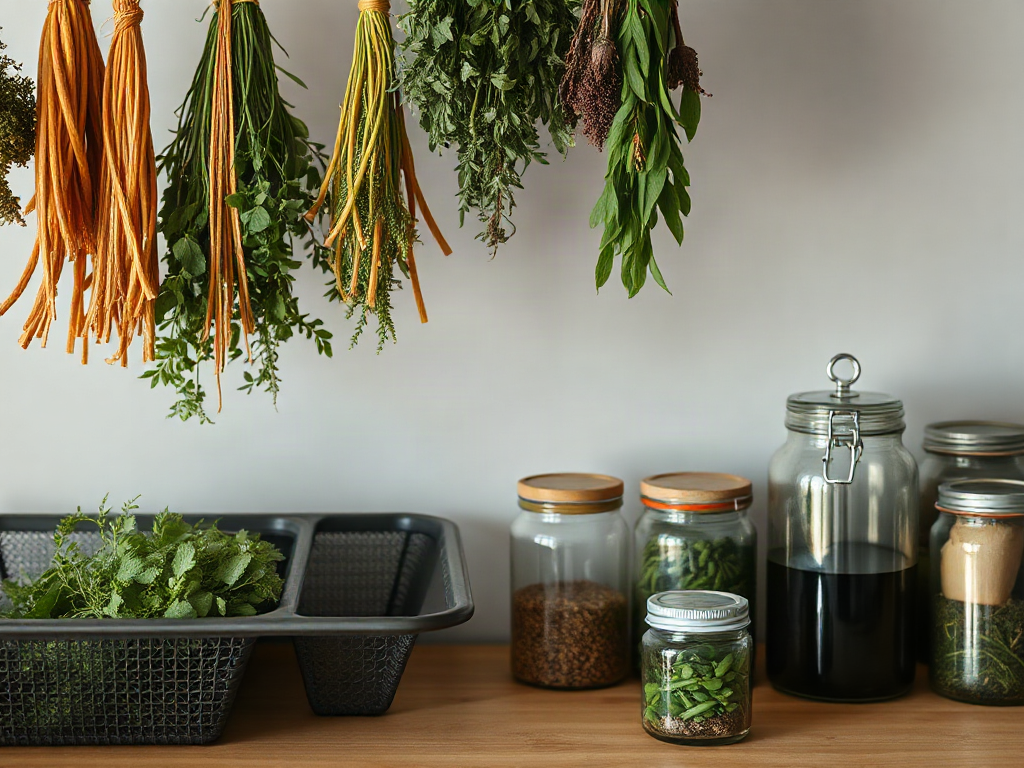
Drying herbs safely from a homestead farm means removing moisture quickly enough to limit mold while protecting the leaves’ aroma, color, and flavor. Harvest clean, healthy plants after surface dew has evaporated, remove damaged material, and dry leaves in thin layers or small bundles with steady airflow. A dehydrator set near 95–115°F offers more control than an oven, especially in humid weather. Herbs are ready for storage when leaves crumble easily and stems snap rather than bend. Discard any batch that develops condensation, musty odors, fuzzy growth, or persistent soft spots.
What you’ll learn
This guide covers the following practical points:
- Harvest and Prepare Herbs for Drying — Drying quality begins before the herbs enter the drying room.
- Choose a Safe Drying Method — The safest practical method is the one that provides gentle heat, low humidity, and continuous air movement.
- Check Herbs for Complete Dryness — Complete dryness is determined by texture throughout the batch, not by elapsed time.
- Package and Store Dried Herbs — Storage protects dryness only after the herbs have cooled completely.
Harvest and Prepare Herbs for Drying
Drying quality begins before the herbs enter the drying room. Cut culinary herbs after dew or irrigation water has evaporated but before prolonged afternoon heat causes delicate leaves to wilt. Choose vigorous stems without visible disease, insect residue, soil splashes, or yellowed foliage. A few blemished leaves can be removed; a musty, slimy, or heavily spotted harvest should not be preserved.
Handle each herb according to its condition rather than washing every bundle automatically. Clean plants harvested above mulched soil may only need inspection and gentle shaking. Herbs carrying dust or grit can be rinsed under cool running water, but they must be drained thoroughly and blotted or spun dry. Water trapped where leaves meet stems slows drying and creates a favorable place for spoilage.
Strip away bruised material and separate thick stems from tender leaves when practical. Large-leaved herbs such as sage dry more evenly when arranged individually. Parsley and mint can remain on short stems, provided they are not crowded. Keep different herbs in separate batches because leaf thickness, oil content, and stem size change the drying time.
A useful harvest-preparation check is:
- Dry surface: No dew, rinse water, or rain remains on the foliage.
- Sound tissue: Leaves are firm and free from decay or fuzzy growth.
- Clean handling: Trays, scissors, hands, and work surfaces are clean.
- Uniform batch: Similar leaf sizes are grouped together for even drying.
The common mistake is packing a large harvest into baskets and postponing preparation. Warm, compressed foliage can heat and wilt rapidly. If immediate drying is impossible, spread the herbs loosely in a cool location rather than leaving them in a dense pile.
Choose a Safe Drying Method
The safest practical method is the one that provides gentle heat, low humidity, and continuous air movement. A food dehydrator gives the most consistent control during rainy or humid periods. Arrange leaves in a single layer without overlap and use the manufacturer’s herb setting or a low temperature near 95–115°F. Rotate trays if the machine dries unevenly, and begin checking delicate leaves early rather than relying only on a timer.
| Method | Best Use | Main Constraint |
|---|---|---|
| Dehydrator | Humid weather and predictable batches | Excess heat can reduce aroma and darken leaves |
| Indoor air drying | Small amounts of sturdy, low-moisture herbs | Fails when bundles are large or the room is damp |
| Low oven | Occasional batches when no dehydrator is available | Many ovens run too hot for delicate herbs |
Indoor air drying suits rosemary, thyme, oregano, and similarly sturdy herbs when the room is warm, dry, clean, and well ventilated. Tie only a few stems per bundle and hang them away from cooking steam, direct sunlight, dust, and animal access. A paper bag loosely placed around a bundle can catch falling leaves, but it needs ventilation openings and enough space to avoid trapping moisture.
Tray drying is preferable for basil, mint, parsley, and other leafy herbs that can compress inside bundles. Place them on a clean screen or drying rack with space between leaves. Do not use galvanized, rusty, painted, or unknown metal screening where food touches the surface.
An oven is a fallback, not the most forgiving choice. Use its lowest stable setting, provide ventilation as the appliance instructions permit, and watch the herbs closely. If the leaves brown, smell cooked, or become brittle on the edges while remaining pliable near the stems, the heat is too strong. Outdoor sun drying is difficult to protect from insects, dust, moisture changes, and intense light, so it is poorly suited to a controlled homestead herb batch.
Check Herbs for Complete Dryness
Complete dryness is determined by texture throughout the batch, not by elapsed time. Drying may take several hours in a dehydrator or several days in open air, depending on leaf thickness, room humidity, bundle size, and equipment. Treat published times as checkpoints rather than guarantees.
Cool several representative pieces before testing because warm herbs can feel drier than they are. Properly dried leaves should crumble readily between the fingers. Small stems should snap; thick stems can be removed before packaging if they remain flexible. Check leaves from the center of bundles and the least exposed area of every tray, where residual moisture is most likely to remain.
Consider two batches of mint harvested on the same morning. Mint spread loosely over ventilated trays can release moisture evenly, while an equal amount tied into one thick bundle may feel crisp on the outside and remain soft at its center. Packaging both at the same time would put the bundled batch at greater risk of condensation and spoilage. The correct response is to separate the flexible material and continue drying it, not to mix it with finished leaves.
Color loss alone does not prove that herbs are unsafe; light, excessive heat, and age can all fade leaves. Odor and moisture are more useful warning signs. Sour or musty smells, damp clumps, fuzzy growth, and moisture beads inside a test container indicate failure. Moldy herbs should be discarded rather than sorted, reheated, or blended into a sound batch.
Package and Store Dried Herbs
Storage protects dryness only after the herbs have cooled completely. Place finished herbs in clean, dry, airtight containers such as glass jars or food-grade containers with secure lids. Packaging warm leaves can create condensation, while loosely closed bags allow humid air and pantry odors to enter.
Keep leaves as whole as practical and crush them when cooking. Whole dried leaves generally retain aroma better because less surface area is exposed to oxygen. Label every container with the herb and drying date; similar-looking jars of marjoram, oregano, and thyme are surprisingly easy to confuse after several months.
For the first several days, inspect containers for fogging, droplets, clumping, or leaves that have softened. If moisture appears but there is no off odor or visible growth, remove the herbs promptly and dry them again. Any sign of mold warrants discarding the entire container because growth may extend beyond what is visible.
A cool, dark, dry cupboard is better than a shelf beside the stove, dishwasher, sink, or sunny window. Heat and light weaken flavor, while repeated humidity exposure can reverse some of the drying work. Store small working quantities separately if the main jar would otherwise be opened over a steaming pot. Before use, check the aroma and condition; stale herbs may have little culinary value even when they remain visibly dry.
Frequently Asked Questions
Should freshly harvested herbs be washed before drying?
Wash herbs when they carry soil, dust, or other visible contamination. Rinse under cool running water, drain well, and remove surface moisture before drying; clean herbs may only need careful inspection.
What temperature should a dehydrator use for herbs?
Use the appliance’s herb setting or a low setting near 95–115°F. Check the manual because dehydrator controls and airflow differ, and avoid raising the heat merely to finish faster.
How can I tell when herbs are dry enough to store?
Cool a sample, then test several leaves and stems. Leaves should crumble easily, small stems should snap, and no part of the batch should feel cool, soft, or pliable from retained moisture.
Can herbs be dried in direct sunlight?
Direct sun is difficult to control and can expose herbs to dust, insects, changing humidity, and strong light. Indoor air drying or a low-temperature dehydrator provides a cleaner, more consistent process.
What should I do if a jar of dried herbs develops condensation?
Remove the herbs immediately and inspect them. Re-dry them only when there is no mold or off odor; discard the entire batch if fuzzy growth, mustiness, or decay is present.
Conclusion
Successful herb drying depends more on moisture control than speed. Begin with sound, surface-dry plants, match the drying method to the herb and weather, and test the least-exposed leaves before packaging. Monitor sealed containers during their first few days and reject herbs showing mold or musty odors. A labeled jar kept away from heat, steam, and sunlight preserves the value of a carefully handled harvest.